Get started
The fastest path to a running Vancetope is the prebuilt Docker stack. You don’t need any developer tools — no Java, Node, Maven or even git. Just Docker Desktop. From a clean machine to an open Web UI: a few minutes once Docker is installed.
Table of contents
- Before you start
- Quick start
- Desktop app & CLI (optional)
- Install project kits (optional)
- What you get
- Expert options
- Upgrading
- Running from source (developers)
- First steps in the Web UI
Before you start
You only need Docker — nothing else. This runs fine on a spare or older machine with no development setup on it.
- macOS / Windows: install Docker Desktop,
open it once, and wait for the whale icon in the menu bar to go steady. It
bundles everything (
docker composeincluded). Works on both Apple Silicon and older Intel Macs — the images are multi-arch. - Linux: Docker Engine 24+ with the Compose v2 plugin (
docker compose, not the legacydocker-compose). - ~2 GB free RAM, and outbound HTTPS to Docker Hub (image pulls) and to your LLM provider (Anthropic, OpenAI, Gemini, …).
The only terminal you need is the one that comes with your setup: Terminal.app
on a Mac, your usual shell on Linux, or — on Windows — the WSL2 terminal
(e.g. Ubuntu). Docker Desktop on Windows runs on WSL2 anyway, so open that shell
and use the exact same commands below; the one-liners are bash. (There’s no
native cmd/PowerShell installer — WSL2 is the intended Windows path.)
Quick start
Two commands on a machine with Docker running — no git, no download:
# 1) Install & start the stack (MongoDB + Brain + Web UI)
curl -fsSL https://www.vancetope.com/install.sh | bash

# 2) Configure it — create a tenant + user and pick an LLM provider
curl -fsSL https://www.vancetope.com/setup.sh | bash
Step 1 runs the setup wizard straight from the official Docker image (a few
questions — language, port, local vs. external access, plus secrets it
generates for you), writes your docker-compose.yml and .env into ~/.vancetope
(override with VANCE_DIR), and starts the stack. Step 2 finds that folder, waits for the stack
to come up, and runs the tenant/user/LLM wizard against it. Both are
interactive — just answer the prompts.
Then open the URL it prints (a local install defaults to http://localhost:9999) and log in with the user you just created.
Pinned by default. The wizard writes the version of the image it runs from into
IMAGE_TAGin.env— a wizard pulled from:latestwhile that is0.4.1pins the stack to0.4.1— sodocker compose pull && docker compose up -dnever silently changes what you run. Upgrading on purpose means re-running the wizard from the new image (see Upgrading). Prefer a rolling channel? Picklatestfor the image tag in the wizard’s expert mode. To install a specific version up front, setIMAGE_TAGon thebashside of the pipe — e.g.curl -fsSL https://www.vancetope.com/install.sh | IMAGE_TAG=0.4.1 bash. Available tags are on the Releases page.
What you’ll see
Step 1 — the installer runs the wizard, then starts the stack:
$ curl -fsSL https://www.vancetope.com/install.sh | bash
Vancetope — setup
A workspace for AI. No git, no build tools — just Docker.
Setup folder: ~/.vancetope
Pulling the setup image on first run — this can take a minute.
Vancetope — Docker Compose Setup
============================
Settings
--------
1) Default language: English (en)
2) Anus login password: (none — REPL open)
3) Secret encryption pw: ******** (auto-generated)
4) Analysis (Fook): disabled
5) Access mode: local (localhost)
8) Vancetope port: http://localhost:9999
9) Expert mode: off
Edit a number, s) Save, q) Quit: s
Starting the stack (docker compose up -d)…
✔ mongodb Healthy
✔ redis Healthy
✔ brain Started
✔ face Started
✔ caddy Started
Installed and starting. Now configure your tenant + first user:
curl -fsSL https://www.vancetope.com/setup.sh | bash
Step 2 — the setup wizard creates the tenant, first user and LLM provider:
$ curl -fsSL https://www.vancetope.com/setup.sh | bash
Using: ~/.vancetope
Ensuring the stack is running… ✔
Waiting for MongoDB to become ready… ✔
Vancetope Setup
===========
No tenants yet — let's create one.
New tenant name (lowercase, e.g. acme): acme
Tenant title (display name, optional): Acme Inc.
No users in tenant 'acme' — let's create one.
New user name (login, lowercase, e.g. wile.coyote): wile.coyote
User title (display name, optional): Wile E. Coyote
Email (optional): wile@acme.example
Password: *******
Confirm: *******
Setup
-----
1) Tenant: acme (new)
2) Tenant title: Acme Inc.
3) Username: wile.coyote (new)
4) User title: Wile E. Coyote
5) User email: wile@acme.example
6) AI provider: Gemini
7) AI model: gemini-2.5-flash
8) AI API key: (not set)
9) Embedding API key: (not set) (reuses chat key if blank)
10) Serper key (research): (not set)
Edit [1-10], s) Save, q) Quit: 8
AI API key (blank to keep current): ***
Edit [1-10], s) Save, q) Quit: s
Saving…
+ tenant 'acme' created
+ user 'wile.coyote' created
+ Gemini API key written
~ AI defaults written (Gemini / gemini-2.5-flash)
Done.
Prefer to run it by hand? No script needed — Docker does all of it:
# 1) scaffold docker-compose.yml + .env into ~/.vancetope (interactive wizard)
mkdir -p ~/.vancetope
docker run --rm -it -v "$HOME/.vancetope:/data" mhus/vancetope-anus:latest --setup-docker-compose # pins IMAGE_TAG to this image's version
cd ~/.vancetope
# 2) start the stack
docker compose up -d
# 3) configure it — tenant + user + LLM (Docker reads .env; we add the Mongo URI)
pw="$(sed -n 's/^MONGO_INITDB_ROOT_PASSWORD=//p' .env)"
docker run --rm -it --network vance_default --env-file .env \
-e SPRING_PROFILES_ACTIVE=prod \
-e VANCE_MONGODB_URI="mongodb://root:$pw@mongodb:27017/vance?authSource=admin" \
mhus/vancetope-anus:latest --setup
What the setup step asks for
The setup step (curl … setup.sh | bash) creates your tenant, first user and
LLM provider. Have these ready:
- Tenant name + title — e.g.
acme/Acme Inc. - First user — login, display name, email, password
- LLM provider — Gemini, OpenAI or Anthropic
- API key for the chosen provider
- Optional: Serper API key for web research
The wizard writes everything to MongoDB and exits. Re-run it later to add another tenant or user; existing entries are not overwritten unless you explicitly change them.
Bring your own model
Vancetope is not an AI provider. It ships no model and hosts none — it’s the place the agents work, not the brain behind them. You supply the model, and your keys and token spend stay with whoever you get it from. Two ways:
- A hosted API, bought or rented per token — e.g. OpenAI, Google Gemini, DeepSeek, Z.ai (GLM), or an OpenAI-compatible gateway like Cortecs (EU-hosted, one key for many models). Paste the API key into Settings → AI (or the setup wizard).
- A local model you run yourself — Ollama or LM Studio on your own machine, no per-token cost. Point Vancetope at its endpoint.
Any OpenAI-compatible endpoint works: set the provider’s type, apiKey and
baseUrl under Settings → AI. Which model actually holds up under agentic
load is a separate question — see below.
Choosing a model
Vancetope is an agentic system — the model spends a lot of tokens reasoning, calling tools and writing back. Models that look fine in a chat UI can collapse under that load. Rough current picture (mid-2026):
| Model | Verdict |
|---|---|
| GLM-5.2 | Top recommendation. Strong tool-use, long context, no licensing friction for agentic workloads. |
| DeepSeek V4 | Strong choice. Comparable quality to GLM-5.2, very competitive pricing. |
| Gemini 3.x Pro / Flash | Solid. Flash is good for the fast-tier alias, Pro for analyze/deep. Wizard preset. Stick to 3.x — 2.5 is shaky under agentic load. |
| OpenAI GPT-4o / o-series | Solid. Wizard preset. |
| Anthropic Claude | Not recommended. Anthropic’s Usage Policy and Commercial Terms restrict autonomous-agent use — which is the core of what Vancetope does. Capable models, but the terms rule them out for this; confirm your specific use case is covered before relying on them. |
| Gemma 4 | The realistic minimum. Works, but expect occasional tool-call failures and weaker long-context reasoning. Use only if you have a hard self-hosting requirement. |
| Qwen 3.5 | Not recommended. Inconsistent tool-call behaviour and instruction-following under Vancetope’s load patterns. |
The wizard ships presets for Gemini, OpenAI and Anthropic. For
GLM-5.2, DeepSeek and self-hosted models (Gemma via Ollama etc.),
finish the wizard with any provider, then switch the active provider in
the Web UI under Settings → AI, or pre-seed it with
confidential/init-settings.yaml in the source repo.
Secrets & exposure: the setup wizard generates strong secrets for you (encryption password, internal token, Mongo password) — no weak defaults to change. To reach Vancetope from beyond
localhost, pick the wizard’s external URL option: cookies then get theSecureflag and the bundled Caddy can auto-provision TLS for your domain.
Desktop app & CLI (optional)
The Web UI works in any browser, but there are two native clients too — both
from the Homebrew tap mhus/vancetope. Each connects to a running Brain (it
asks for the Brain URL and your login on first launch); neither bundles one.
Desktop app (macOS) — a native Vancetope window around the workspace:
brew install --cask mhus/vancetope/vancetope-desktop
Not signed yet. The 0.1.x app isn’t code-signed or notarized, so macOS Gatekeeper blocks it on first launch (“Vancetope can’t be opened…” or “is damaged”). Signing is on the roadmap. Until then, either install without the quarantine flag —
brew install --cask --no-quarantine mhus/vancetope/vancetope-desktop— or, if it’s already installed, runxattr -dr com.apple.quarantine /Applications/Vancetope.appand then open it (or right-click the app → Open).
CLI — the vancetope terminal client (bundles its own OpenJDK 25, no system
Java needed):
brew install mhus/vancetope/vancetope
vancetope
Install project kits (optional)
Project kits pre-configure a project — thinking patterns, worker recipes, tool packs, settings. To make the catalog of available kits show up in your tenant (it fills the kit dropdown when you create a project), import it from the public kit repo with the anus one-shot:
curl -fsSL https://www.vancetope.com/anus.sh | bash -s -- --sudo "project-kits import -T acme"
Replace acme with your tenant name. Check what landed:
curl -fsSL https://www.vancetope.com/anus.sh | bash -s -- --sudo "project-kits show -T acme"
anus.sh is the general admin one-shot — it runs any anus command against your
running stack (--sudo "…" for a single command; no args drops you into the
interactive REPL). Already imported once? Use project-kits update instead of
import.
What you get
The core stack is always MongoDB + Brain + Web UI. The wizard’s expert options can add Redis (for live-collaboration features) and debug UIs.
| Service | Default port | When |
|---|---|---|
| Web UI | 9999 (default; VANCE_PORT) |
always |
| Brain (REST/WS) | 9990 | always (host-exposed only if you opt in) |
| MongoDB | 27017 | always (host-exposed only if you opt in) |
| Redis (live-WS) | 6379 | expert option |
| mongo-express / redis-commander (debug UIs) | 9081 / — | expert · --profile tools |
Ports and which services are exposed depend on your wizard answers. All data
lives in named Docker volumes: docker compose down keeps it,
docker compose down -v resets the stack.
Expert options
Re-run the installer (or the direct docker run … --setup-docker-compose) and
turn on Expert mode for extra toggles: Redis for live features, debug UIs
(mongo-express, redis-commander) behind docker compose --profile tools up -d,
an Anus admin service, exposing the Brain/Mongo/Redis host ports, and the image
tag. Your previous answers are pre-filled from the existing .env.
Upgrading
The stack is pinned: IMAGE_TAG in .env names the exact version of the
wizard that rendered these files. Updating therefore means re-running the
wizard from the new image — it bumps the pin and re-renders the compose
files — then pulling and rolling:
cd ~/.vancetope
docker run --rm -it -v "$PWD:/data" \
mhus/vancetope-anus:<new version> --setup-docker-compose
docker compose pull && docker
compose up -d
Data is migrated automatically when the new brain boots.
Rolling channel instead: pick latest for the image tag in the wizard’s
expert mode — then the pin never changes and docker compose pull && docker
compose up -d alone is the whole update. Re-run the wizard only when the
release notes say the generated files changed.
Running from source (developers)
If you want to hack on Vancetope itself, clone the source repo and build locally instead of pulling images:
git clone https://github.com/mhus/vance.git
cd vance/vance-brain
mvn spring-boot:run

# In another terminal:
cd vance/vance-foot
java -jar target/vance-foot.jar

# Web UI:
cd repos/vance/client && pnpm install && pnpm --filter @vance/vance-face dev
This path requires Java 25, Maven, pnpm and a local MongoDB.
First steps in the Web UI
Everything above happens in a terminal. Once the stack is up and you’ve created a user, the rest lives in the browser. Here’s the first walk-through — from the login screen to your first answer.
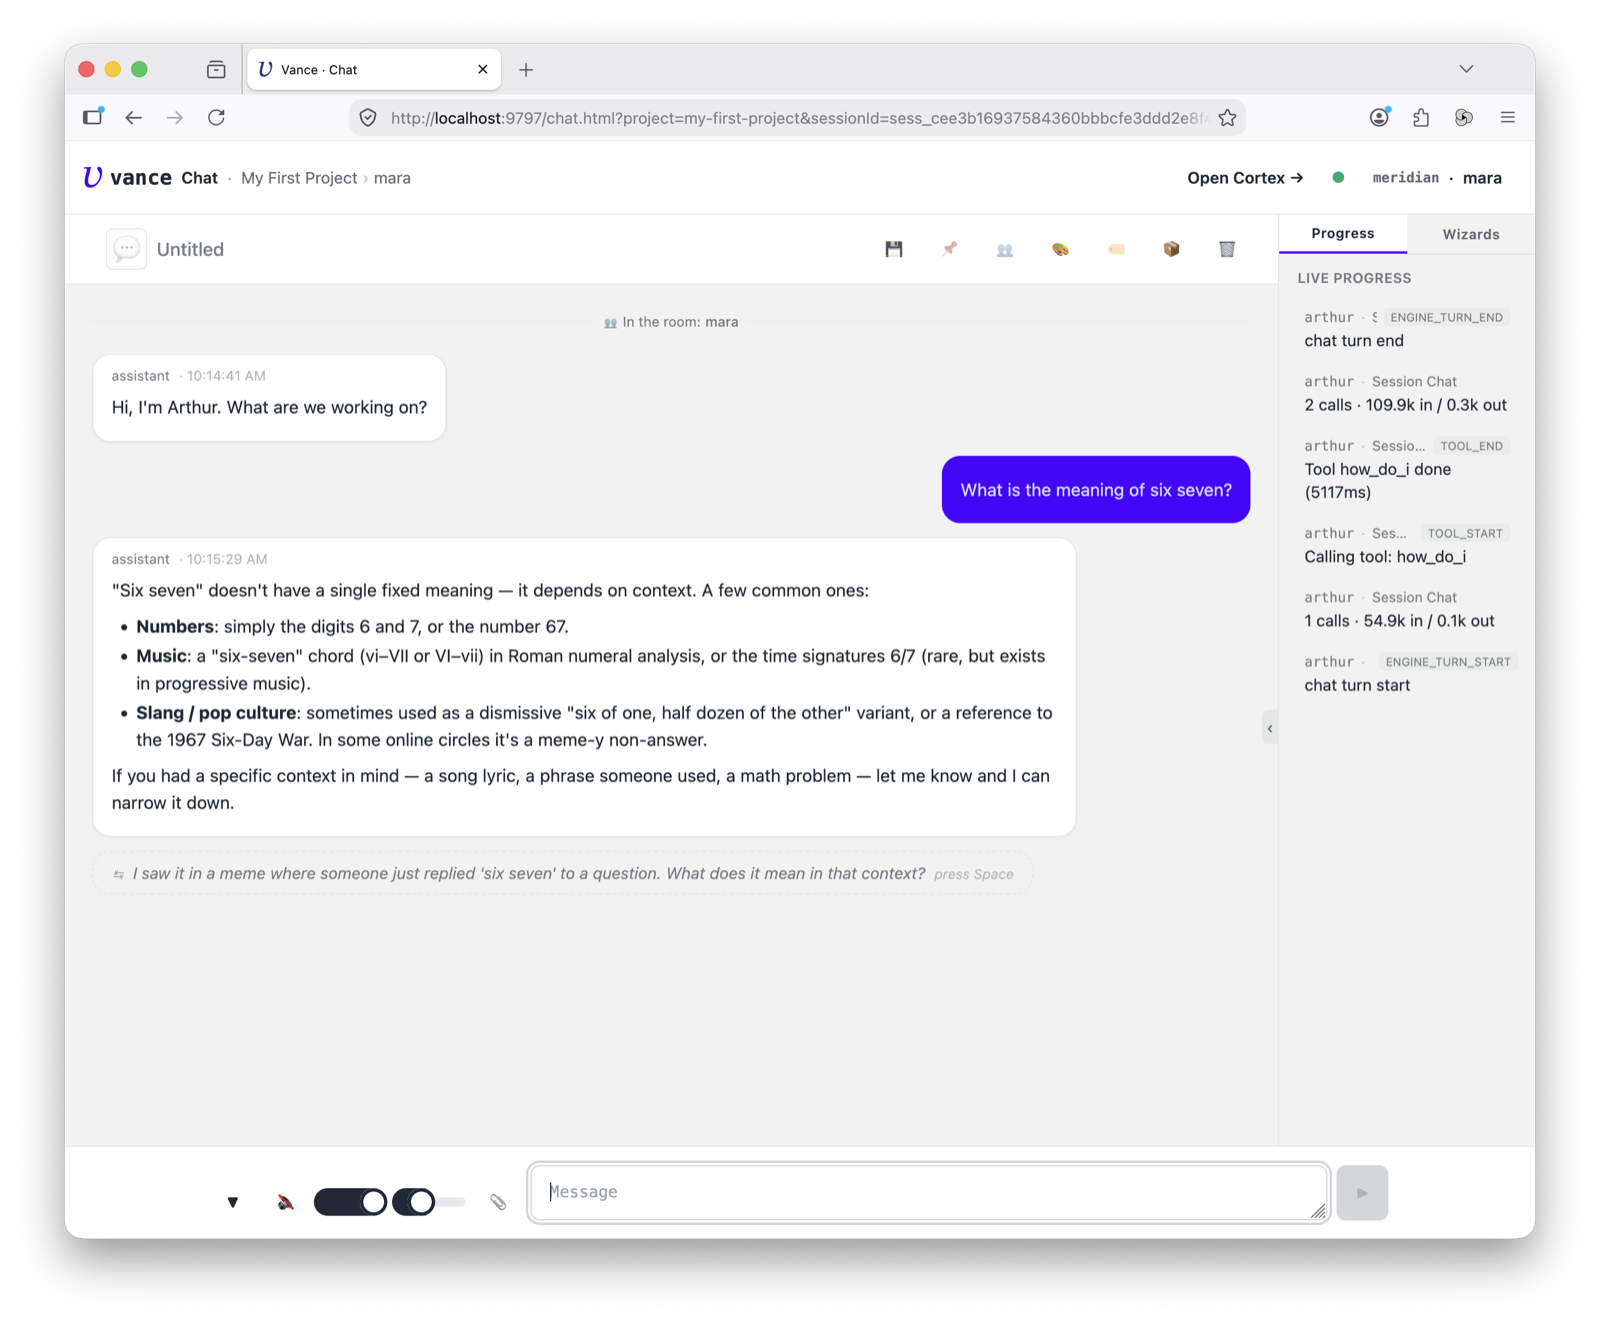
The screenshots show an example workspace (
meridian/mara). You’ll see your own tenant and user name instead — whatever you entered in the setup step.
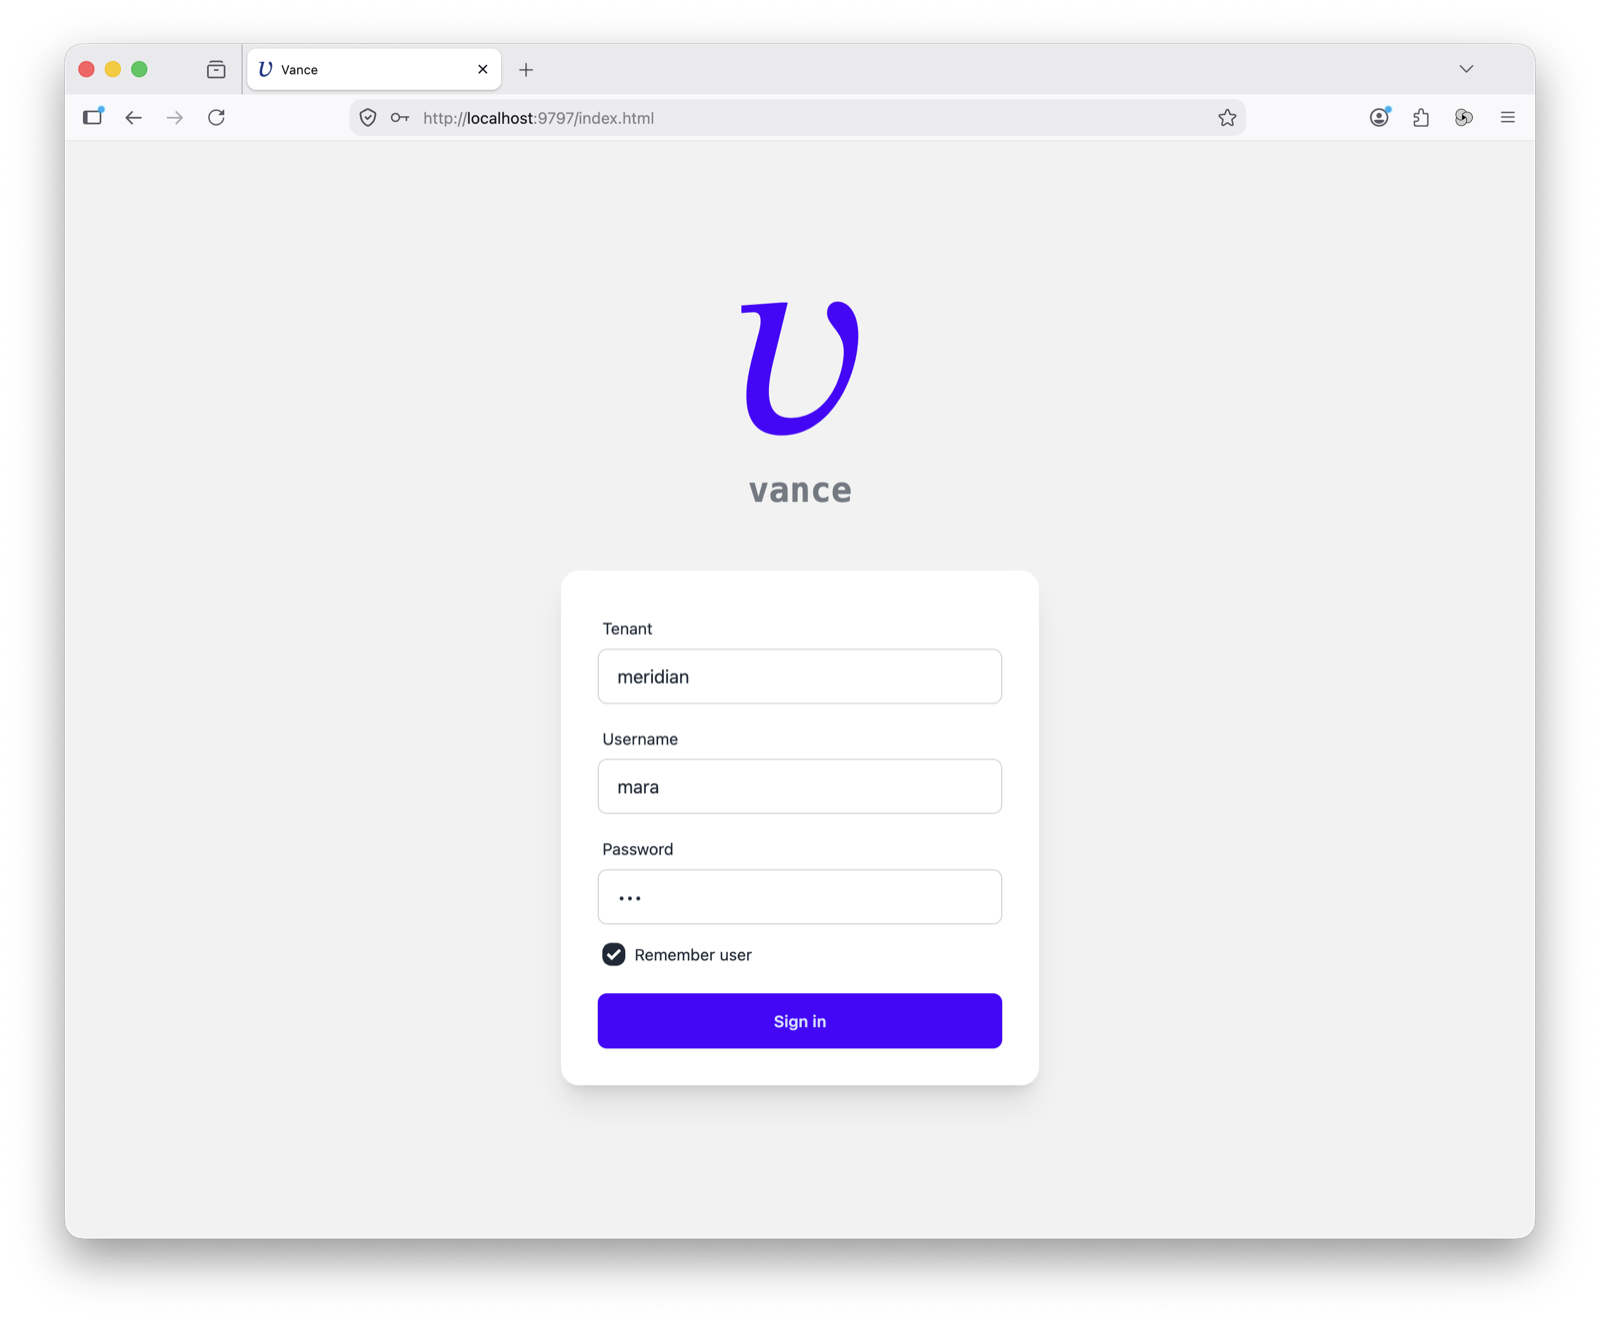
1. Log in. Open the URL the installer printed and sign in with the user you just created. The tenant is pre-filled; enter your login and password.
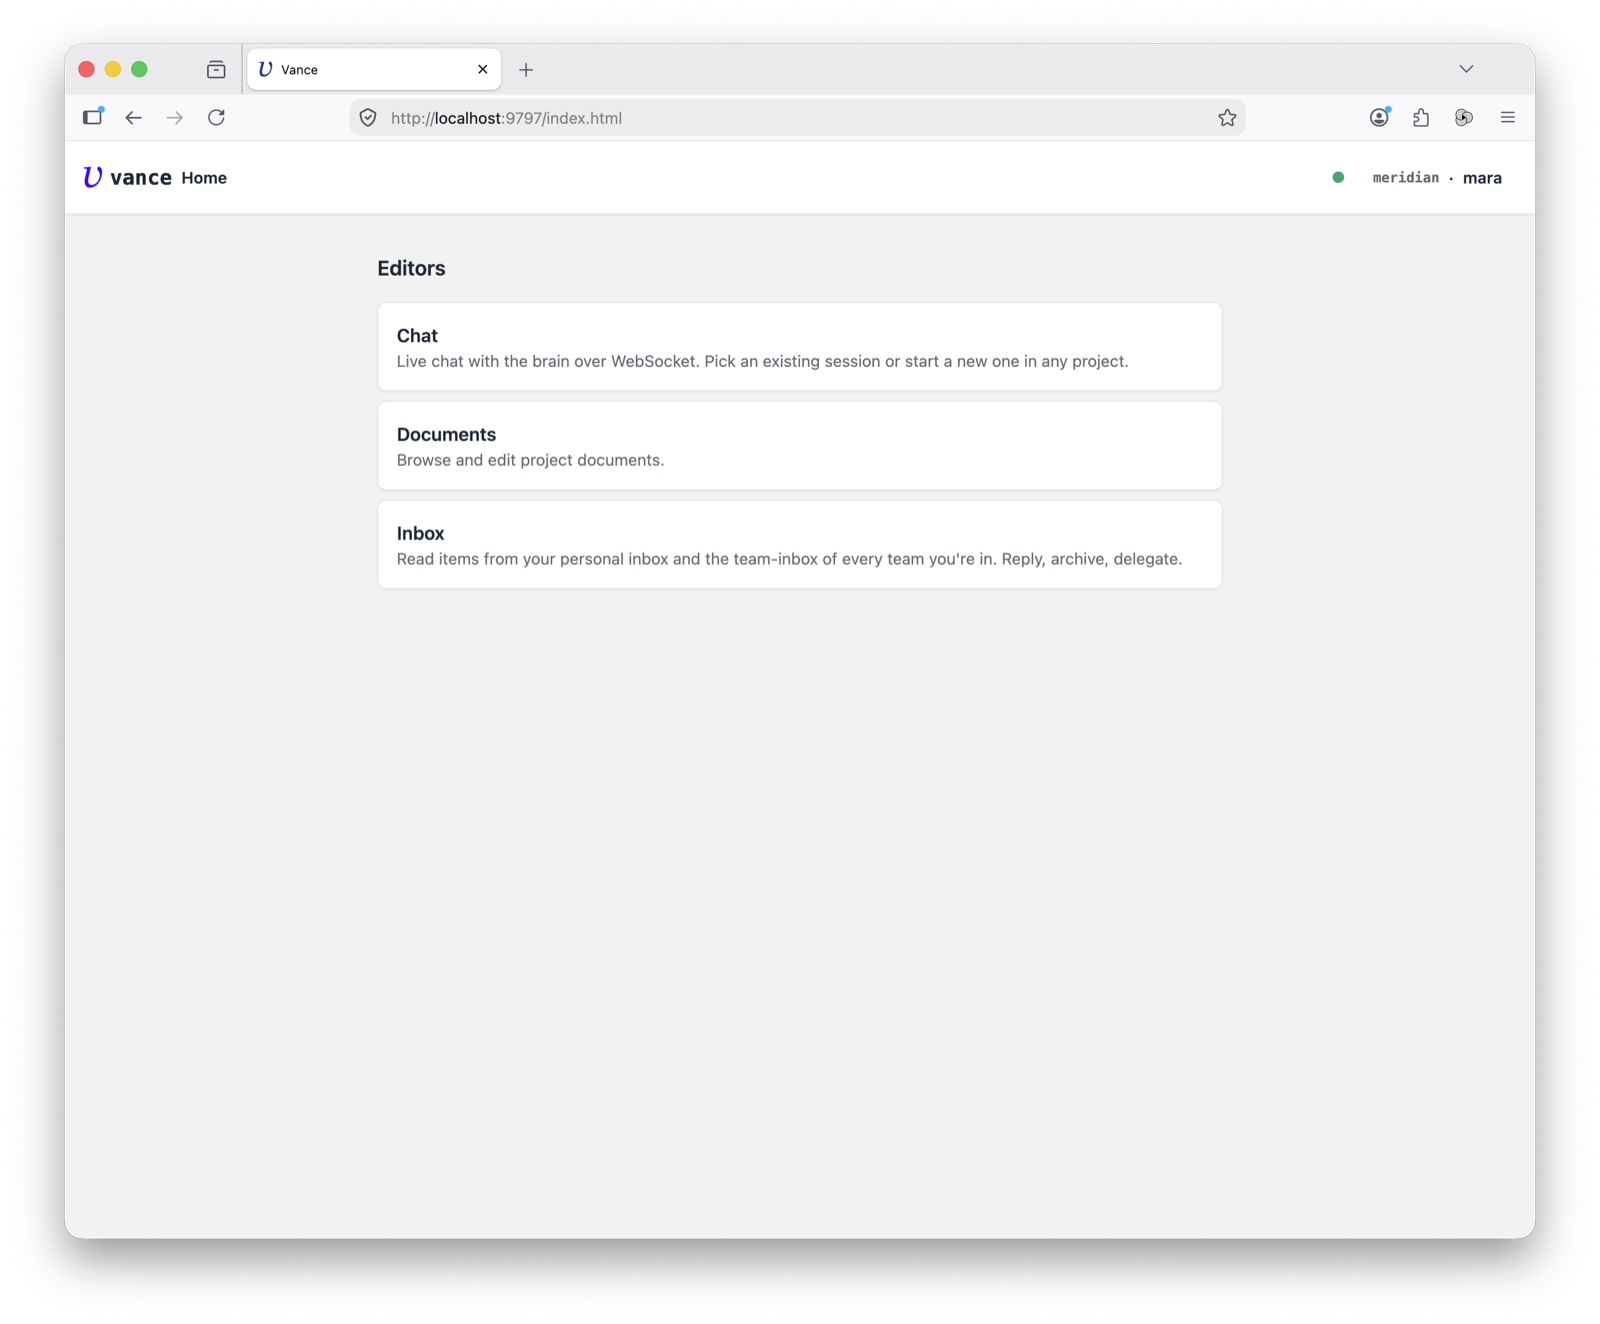
2. Land on the hub. After login you get the editor hub — every workspace
surface (Chat, Documents, Cortex, Inbox, …) is one tile away. The bar top-right
always shows the active tenant · user.
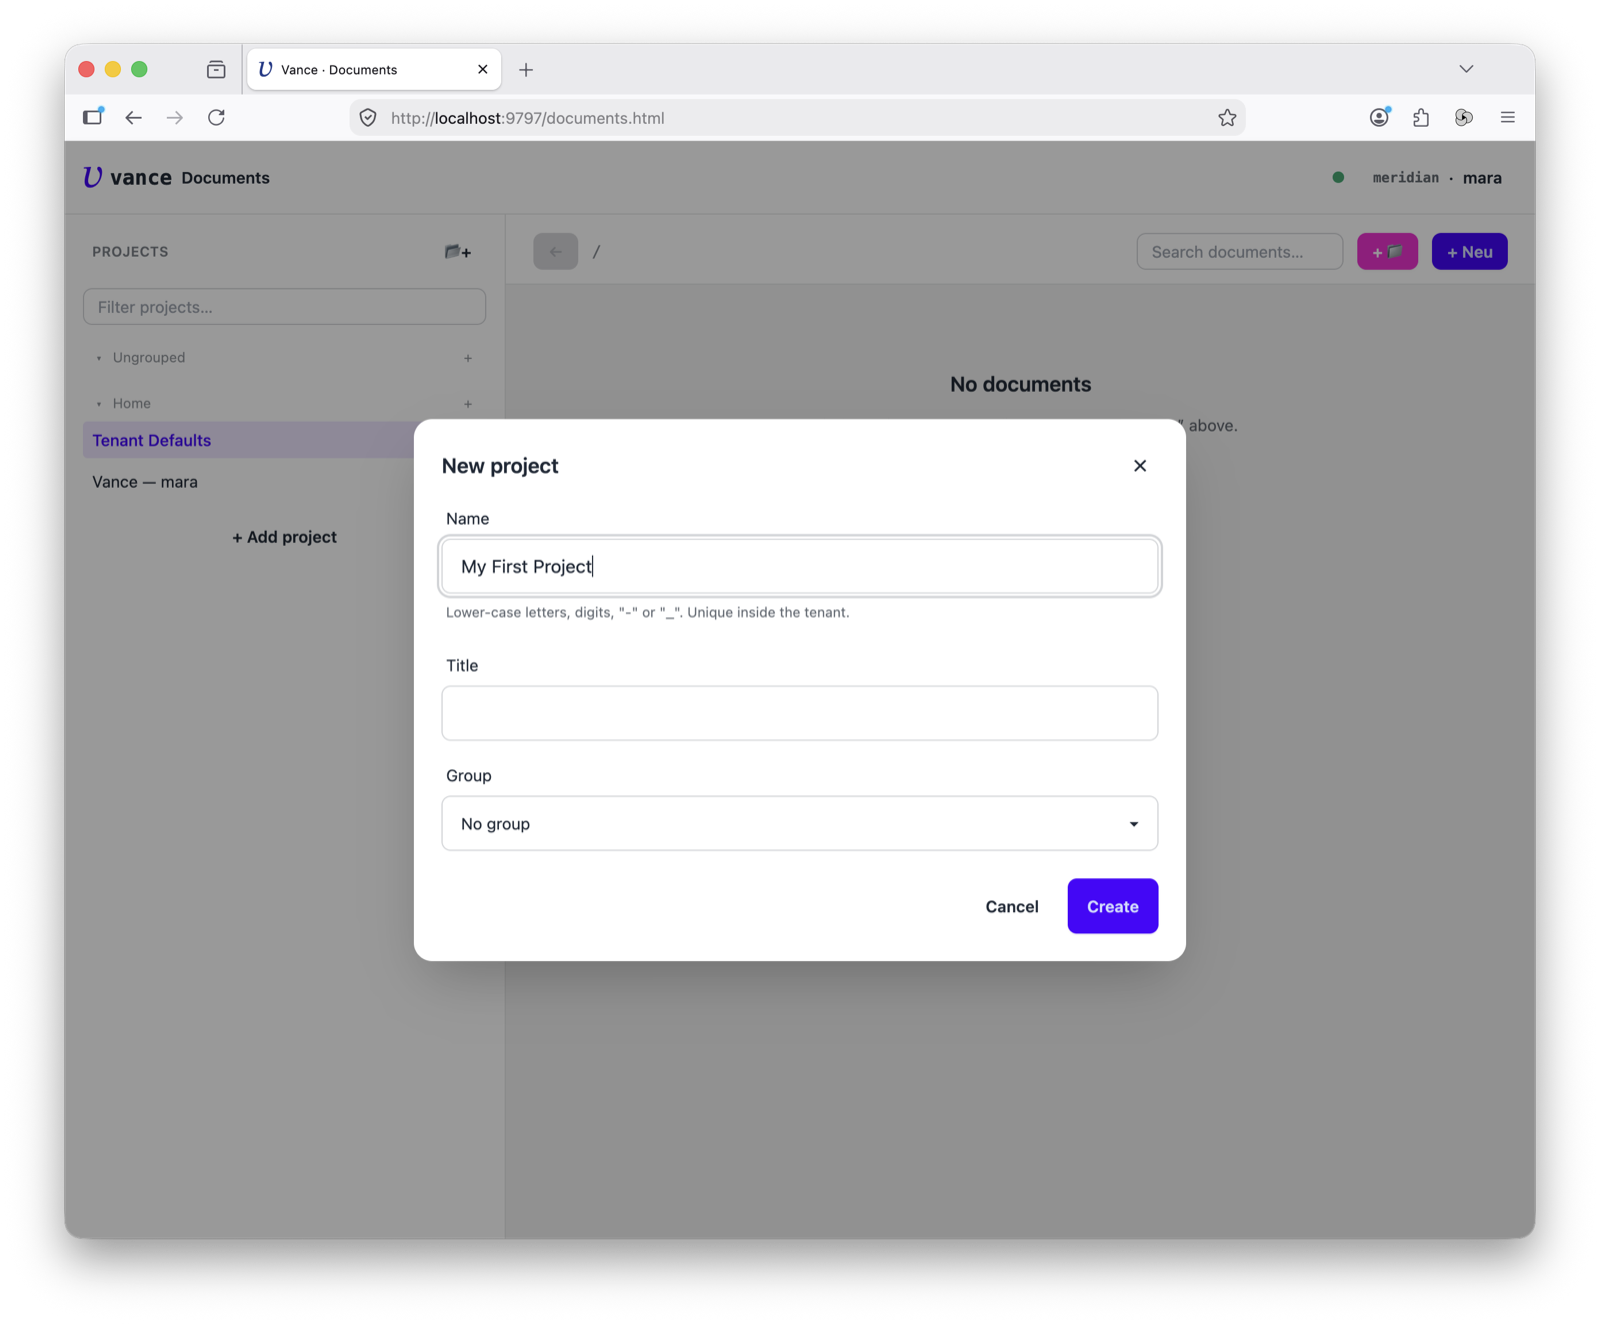
3. Create a project. A project is a scope — its own documents, sessions, settings and memory. Hit + Add project, give it a lowercase name (the technical key) and an optional title.
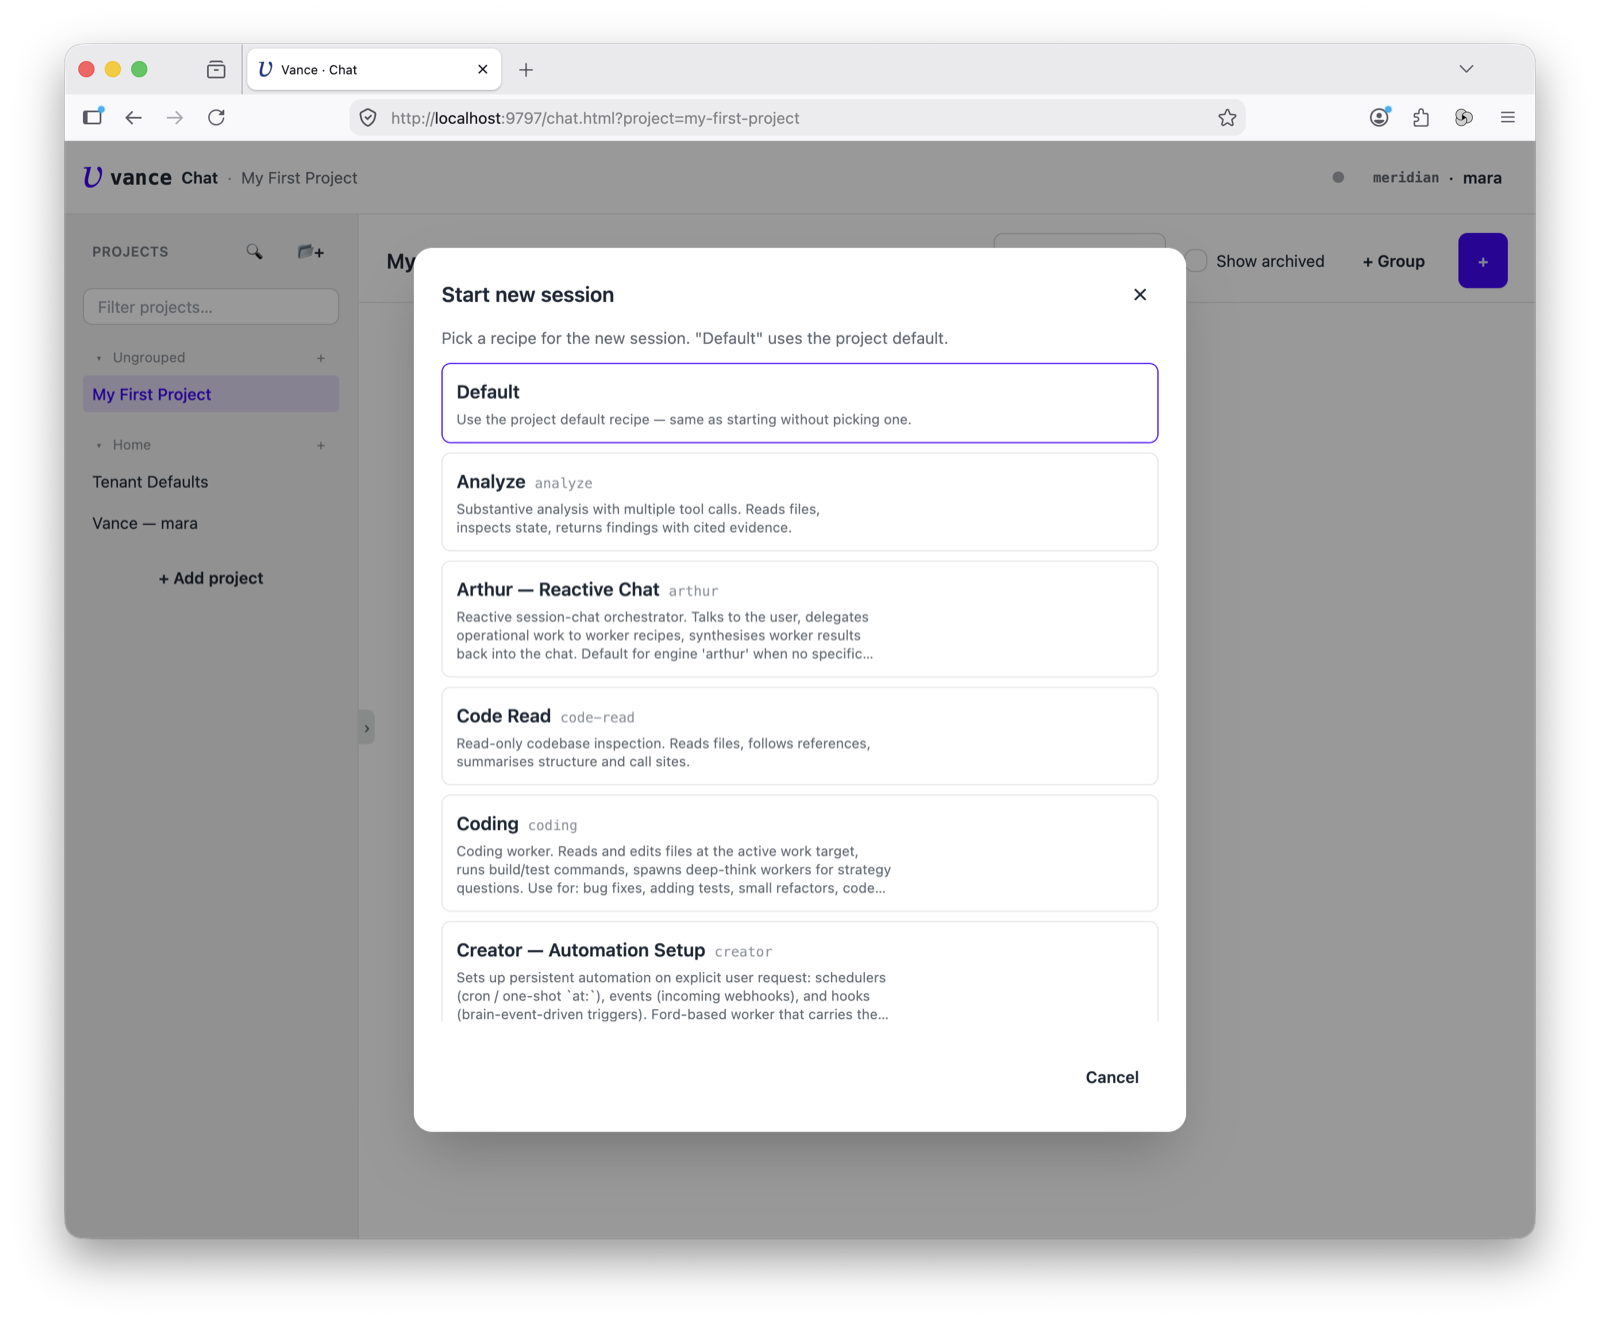
4. Start a session. In Chat, open a new session and pick a recipe — a named worker configuration (engine + prompt + tools). Default is the project default; Analyze, Code Read, Coding and others are ready-made.
5. Talk to it. That’s the payoff: a live chat with an agent. Ask a question, and the Progress panel on the right shows what it’s doing turn by turn — tool calls, token counts, engine start/end. Jump into the full document workspace any time with Open Cortex →.
From here you’re in Vancetope proper — see the rest of the docs for documents, apps, kits and automation.